Cosplay is one of the most exciting and creative hobbies out there. Whether you’re a seasoned cosplayer or just starting, you know that every costume requires a lot of time, effort, and attention to detail. One technique that can help elevate your cosplay game is draping.
Draping is a sewing technique where fabric is pinned onto a mannequin or model to create a three-dimensional garment. This method can be used to create custom-fitted costumes and allows you to experiment with different shapes and designs before committing to cutting the fabric.
Draping can be useful for cosplay because it allows you to bring your favorite character to life in an accurate and visually stunning way. Instead of relying on commercial patterns, which may not always fit properly or accurately reflect the character’s design, draping lets you create a custom pattern tailored specifically for your body and cosplay project.
The benefits don’t stop there – draping also gives you greater control over the fit of your costume, ensuring that it’s comfortable and functional. It allows for easier adjustments during the creation process, meaning less hassle when making changes after construction has started.
Overall, draping is an essential skill for any serious cosplayer looking to take their creations to the next level. From complex outfits with intricate detailing to simpler costumes made from unique fabrics or materials, draping will give your cosplay design an extra layer of polish that will make it stand out at conventions or other events.
In this article, we’ll go over everything you need to know about using draping when sewing cosplay costumes – from preparing your materials through transferring your pattern onto paper. So let’s get started!

Preparing for Draping
Choose a Dress Form or Model to Drape On
When it comes to draping, having the right foundation is essential. You can either choose a dress form or use a model to drape your cosplay on.
If you plan on making multiple cosplays, investing in a dress form will save you time and money in the long run. Dress forms come in different sizes and shapes, so make sure to choose one that closely matches your body measurements or the measurements of the person you’re making the cosplay for.
Using a model is also an option, but it can be more challenging because people tend to move around and shift their weight. It’s best if your model can stand still for extended periods while you work on draping.
Gather Necessary Materials Such as Muslin Fabric, Pins, and A Marking Tool
Once you have your foundation set up, it’s time to gather materials. The most common fabric used in draping is muslin fabric because it’s lightweight and easy to manipulate.
Make sure to get enough muslin fabric depending on how large your cosplay will be. Next, pins are essential for holding drapes in place.
Use long pins so that they don’t fall out easily when working with heavier fabrics like satin or velvet. Marking tools are necessary for outlining seams and other details onto the muslin fabric.
You can use washable markers or tailor’s chalk depending on personal preference. Before starting your project, make sure all materials are within reach so that you don’t have any interruptions while draping.
What Else Do I Need?
Depending on how complex your cosplay project is going to be, there may be other materials you’ll need beyond muslin fabric, pins, and marking tools. For example:
– Additional fabrics: If certain parts of your cosplay require a different type of fabric, make sure to have them on hand.
– Interfacing: This stiff material is used to give structure to collars, cuffs, and other parts of the costume. – Measuring tape: You’ll need one to measure the model or dress form before starting your draping project.
– Scissors: Sharp scissors make it easier to cut through fabric and trim away excess material. Having all these materials within reach speeds up the process and helps produce better results.
It’s Time To Start Draping!
Preparing for draping may seem like a daunting task, but once you have everything you need, it’s time to start the fun part – creating! Whether you’re making a simple skirt or an elaborate ball gown, draping is an excellent technique that allows you to see how your cosplay will look before cutting fabrics. With muslin fabric draped over your foundation and pinned in place, let your creativity run wild as you experiment with different folds and styles.
Remember that draping is an iterative process; keep making adjustments until you’re satisfied with how it looks. Once complete, transfer the drape onto pattern paper so that it can be used as a guide when cutting out fabric pieces for sewing. If you’d like to learn more about cosplay sewing here.
Draping the Base
Creating a Foundation of Fabric
The first step in draping a cosplay costume is to choose the base layer that you want to drape. This layer should be the foundation of your costume, and it’s essential to get it right in terms of fit and shape. For example, if you’re creating a Cinderella dress, you’ll want to start with the bodice or possibly even the corset.
Choose your fabric carefully, as this will determine how easily it drapes and how easily it is to work with. Once you have chosen your fabric, cut out a large piece of muslin that is roughly the same size as your dress form or model.
Drape this over your form or model so that it covers all areas where you will be draping fabric. Remember that this base layer will become part of your final costume, so make sure that it fits snugly but comfortably.
Pinning for Perfection
With your muslin draped over your form or model, it’s time to start pinning! Use straight pins to pin the fabric in place so that it conforms to the shape of your body and creates some structure. You can use different types of pins depending on what works best for you – some people prefer longer pins because they are easier to handle, while others prefer shorter pins because they are less likely to poke through the fabric.
As you add more pins and shape the muslin around curves and corners, take a step back every now and then and analyze how everything is looking. If something doesn’t seem right (for example, there is an awkward gap between two pieces of fabric), adjust accordingly until everything looks smooth and natural.
Marking Your Way Toward Success
With all these pins in place, it’s easy for things to shift around while taking off the muslin, hence it’s important to mark everything down. Use a marking tool such as chalk or fabric pen to trace the lines of your seams and indicate any other details that you want to incorporate into your final costume. This is also a good time to mark any relevant design aspects that will make your cosplay stand out from others.
Make sure that all of your markings are clear and easy to follow so that you don’t get confused later on. Double-check everything before removing the pins so you can be sure that you captured every detail.
Once you have finished this step, carefully remove the pins and take off the muslin. You should now have a clear idea of what your base layer will look like, complete with all of the necessary markings for transferring onto pattern paper.
Adding Details
Drape Additional Layers
Now that you have your base layer draped and pinned, it’s time to start adding some extra details. This is where you can really get creative and make your cosplay costume stand out. You may want to drape another layer of fabric over the base layer, such as a sheer overlay or a lace fabric. The fabric choice can be very important.
When draping additional layers, use pins to secure the fabric in place and experiment with different folds and draping techniques to create the desired effect. For example, if you’re creating a flowy skirt, try draping the fabric in soft pleats or gathers for a more voluminous look.
Experiment with Different Fabrics and Textures
One of the advantages of draping is that it allows you to experiment with different fabrics and textures before cutting into expensive materials. Take this opportunity to try out different types of fabrics to create unique effects.
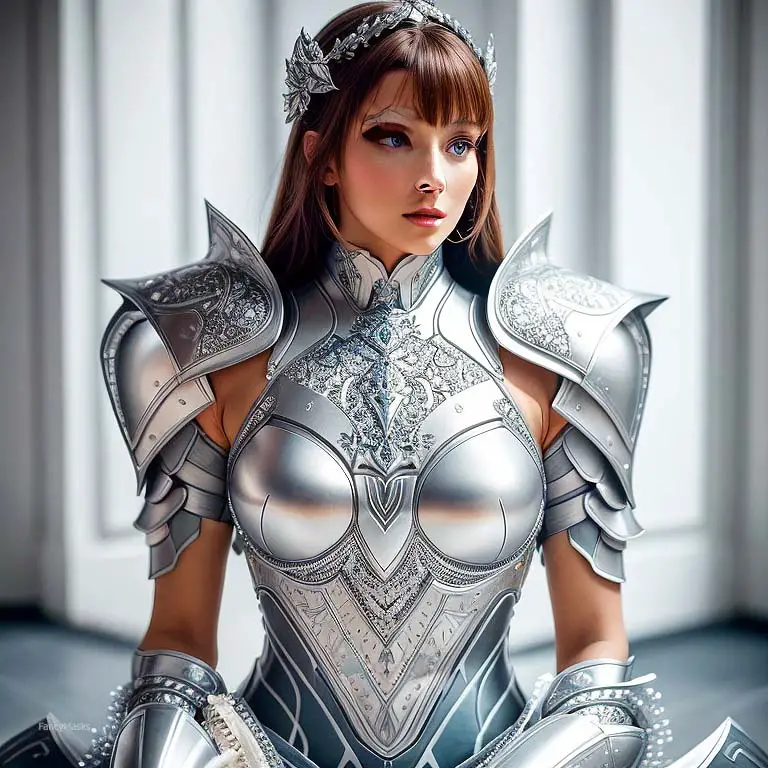
For instance, if you’re creating an armored cosplay costume, try draping metallic fabrics like silver or gold lamé over the base layer for an eye-catching effect. You could also add some texture by draping faux fur or leather over certain parts of the costume.
Adding Embellishments
Once you’ve draped your additional layers onto the base layer of your cosplay costume, it’s time to start thinking about embellishments. This could include adding accessories like belts or jewelry pieces, as well as adding decorative elements directly onto the fabric itself.
For example, if you’re creating a medieval-inspired dress for your cosplay character, consider adding some chainmail embellishments along the neckline or sleeves for an added touch of authenticity. Adding beads or sequins around certain parts of your costume is another way to make it stand out from other costumes at conventions.
Layering Fabrics
Layering fabrics is a great way to create depth and interest in your cosplay costume. You can layer fabrics by draping lighter fabrics over heavier ones, or by adding lace or sheer overlays to certain parts of the costume. One popular way to layer fabrics is by creating a corset-style top for a cosplay dress.
This involves draping a fitted bodice and then adding additional layers of fabric over the top, such as lace or tulle. This creates a multi-dimensional effect that’s sure to turn heads at conventions.
Finalize Your Design
Once you’ve added all the details necessary for your cosplay costume, step back and take a look at your work. Make any necessary adjustments to ensure that the garment fits well and looks exactly how you envisioned it.
It’s important to remember that the draping process is just one part of creating a cosplay costume. After you’ve draped your design, you’ll need to transfer it onto pattern paper and cut out your fabric pieces before sewing them together.
Overall, adding details through draping is an essential part of creating unique and eye-catching cosplay costumes. By experimenting with different fabrics, textures, and embellishments, you can create truly one-of-a-kind designs that will impress everyone at conventions.
Making Adjustments
Analyze the Draping from All Angles
When you’ve draped your cosplay costume, it’s important to take a step back and analyze it from all angles. This means checking the way it looks from the front, back, and sides to ensure that everything is fitting properly.
Make sure that any seams or details are where they should be and that everything falls in a flattering way. One thing that can help with this process is taking pictures of your draping.
This allows you to see how things look in a different light and may reveal any issues you hadn’t noticed before. Look at these pictures critically and make note of any changes you need to make.
Make Necessary Adjustments to Ensure Proper Fit and Comfort
Once you’ve analyzed your draping from all angles, it’s time to make any necessary adjustments. This could mean adding or taking away fabric, adjusting the shape of seams or darts, or even re-draping certain parts of the costume.
One common issue with draping is that things may not always fit perfectly the first time around. You may need to do some trial-and-error before getting your costume just right.
Don’t get discouraged if things don’t work out immediately – this is all part of the creative process! When making adjustments, be sure to keep comfort in mind as well as fit.
You don’t want your cosplay costume to be so uncomfortable that you can’t wear it for long periods of time! If anything feels too tight or restrictive, adjust accordingly.
Remember – this part of the process is all about fine-tuning your design until it’s perfect. Take your time with it and don’t rush through anything.
Creative Tip: Experiment with Different Fabrics
If you’re having trouble getting your draping just right, try experimenting with different fabrics. Some fabrics may drape better than others or may be easier to work with, so don’t be afraid to mix things up. You may find that a different fabric helps you achieve the look and fit you’re going for.
Another option is to try draping on a different dress form or model. Different shapes and sizes can affect the way your costume drapes, so it’s worth trying out different options to see what works best.
Ultimately, the key to making adjustments is being patient and persistent. Don’t get discouraged if things don’t work out the way you want them to right away – keep tweaking and adjusting until your cosplay costume fits like a glove!
Transferring Draping to Pattern Paper
Carefully Remove Pins
After completing the draping process, it’s time to transfer your work onto pattern paper. First, carefully remove all of the pins from your muslin fabric.
Be sure to take your time and not rush through this step as you don’t want to damage or distort any of your draping work. Make sure that you remove all of the pins and leave no loose ones behind.
Transfer Draping onto Pattern Paper
Once all of the pins are removed, place the muslin fabric onto your pattern paper. This is where you’ll be transferring over all of your markings and draping work onto a more permanent medium. Start by laying out the muslin and smoothing it out as much as possible so that there are no wrinkles or bumps.
Using a tracing wheel or other marking tool, slowly transfer over all of the lines and markings from your muslin fabric onto the pattern paper beneath it. Take care not to press too hard with any tools as this could create inaccurate markings on your pattern paper.
Add Seam Allowances
After transferring over all lines and marks, add seam allowances around each piece that you’re planning on cutting out from fabric. Seam allowances ensure that the pieces will fit together properly when sewing them together in later steps. Generally, a seam allowance between ¼ – ½ inch (0.6 – 1.25 cm) is standard for most sewing projects, but if you’re following a specific pattern make sure to check what seam allowance they recommend.
Add Other Necessary Markings
In addition to adding seam allowances, make sure that you add any other necessary markings such as grainlines, notches for matching seams when assembling pieces together later on in construction etc. Grainlines indicate how fabric should be lined up when cutting out pieces from fabric.
It’s important to align grainlines with the grain of the fabric so that the finished garment drapes and hangs correctly on the body. Notches are small triangles or squares that are cut into spare of your pattern pieces, they help ensure that you are matching up different parts of a garment (such as sleeves to bodice) accurately.
Cutting Fabric and Sewing
Cut out fabric pieces based on pattern created from draping process
Now that you have your pattern, it’s time to cut out your fabric pieces. Make sure to lay your fabric out flat and smooth, then place the pattern pieces on top. Trace around each piece with a marking tool such as chalk or a disappearing ink pen.
Cut along the traced lines, making sure to leave seam allowances according to your pattern instructions. When cutting, it’s important to pay attention to the grain of the fabric.
Most fabrics have a natural grain that runs parallel to the selvage edge. Make sure all your pattern pieces are cut in the same direction as this grain for consistency in appearance and fit.
If you’re using multiple fabrics for different parts of your cosplay costume, make sure you label each piece with its corresponding pattern piece number. This will make it easier when it comes time to sew everything together.
Sew pieces together according to pattern instructions
Now that you have all your fabric pieces cut out, it’s time to start sewing them together! Follow the instructions in your sewing pattern carefully, making sure to use the correct stitching techniques and stitch lengths for each seam.
It’s also important to press each seam open as you go along. This will help create a neater finished product by flattening any bulkiness caused by multiple layers of fabric.
When attaching two pieces of fabric together, such as when sewing sleeves onto a bodice, make sure they are pinned securely in place before sewing. It can be helpful to mark key points on both pieces with chalk or pins before pinning them together so that they line up perfectly.
Remember that sewing is a slow process that requires patience and attention to detail. Take breaks when needed and don’t rush through any steps – better slow and steady than fast but messy!
Conclusion:
Draping is a useful technique for any cosplay enthusiast looking to create a custom design or add unique details to their costume. Whether you’re just starting out or have been sewing for years, draping can help take your cosplay creations to the next level. One of the benefits of draping is that it allows for greater creativity and customization.
By draping fabric directly onto a dress form or model, you can experiment with different shapes and styles, and tailor your design to suit your particular vision. This is especially helpful if you’re trying to replicate a character’s outfit that doesn’t have an off-the-shelf pattern available.
Draping also allows for greater precision in fit and detail. Because you’re working directly with fabric and pins, you have more control over how the final product will look and feel.
You can easily adjust seams and hemlines as needed, ensuring that your costume fits comfortably and flatters your body type. Another advantage of draping is that it’s a great way to learn about garment construction and pattern-making.
By examining how fabric behaves when draped over certain areas of the body, you can gain insight into how patterns are created. This knowledge will come in handy when creating future costumes or even everyday garments.
Overall, draping is an essential skill for any cosplay enthusiast looking to take their costumes to the next level. It allows for greater creativity, precision and customization than traditional pattern-making techniques, while also providing valuable learning opportunities along the way.
So go ahead – grab some muslin fabric, pins and a dress form or model – and start experimenting with draping today! Who knows what amazing masterpieces you’ll create?

