Introduction: The Art of Cosplay Scars
Cosplay is all about bringing characters to life, and scars are often an important part of a character’s appearance. Whether you’re dressing up as a battle-worn warrior or a horror movie victim, scars can add a touch of realism to your costume that really takes it to the next level. In this article, we’ll explore the art of creating cosplay scars using makeup.
In this article, we’ll cover the materials and tools you’ll need to create cosplay scars, techniques for creating basic and advanced scars, tips for making them last, and how to safely remove the makeup at the end of the day.
What are Cosplay Scars?
Cosplay scars are artificial marks or injuries that are created using makeup or prosthetics to simulate the appearance of real scars. They can range from minor scratches and bruises to deep lacerations and disfigurements.
Importance of Makeup in Creating Cosplay Scars
Makeup is an essential tool for creating realistic cosplay scars. It allows you to add texture, dimension, and color to your scars, making them look more like real injuries. With the right products and techniques, you can create scars that look so convincing, people may even think they’re real!
Materials and Tools Needed to Create Cosplay Scars
Before you start creating your scars, you’ll need to gather some basic materials and tools. Here are the essentials:
Makeup Products Needed
- Foundation or concealer in your skin tone
- Red, brown, and black cream makeup or eyeshadow
- Makeup brushes (small and medium-sized)
- Sponges (for blending and creating texture)
- Powder or setting spray
Essential Tools for Application
- Mirror
- Cotton swabs or makeup sponges (for blending and cleaning up mistakes)
- Small scissors (for trimming fake hair or latex)
Optional Tools for More Advanced Effects
- Scar wax (for creating 3D texture)
- Liquid latex (for creating raised scars)
- Fake blood (for added realism)
Preparing the Skin for Scar Makeup Application
Before you apply scar makeup, it’s important to prepare your skin properly. This will help the makeup go on smoothly and stay in place all day.
Cleaning and Prepping the Skin
- Cleanse your skin with a gentle cleanser and warm water to remove any dirt, oil, or makeup.
- Apply a moisturizer to hydrate your skin and create a smooth base for the makeup.
Choosing the Right Products for Your Skin Type
- If your skin is on the oily side, you will want to choose oil-free products so they won’t clog your pores.
- If your skin is on the dry side, you will want to choose hydrating products that will prevent your skin from looking flaky or patchy.
Applying a Base Layer of Makeup
If you are new to using makeup in your cosplay, we’ve written a full guide to brands of cosplay makeup.
- Apply a thin layer of foundation or concealer to even out your skin tone.
- Use a sponge or brush to blend the makeup into your skin, making sure to cover any blemishes or imperfections.
Techniques for Creating Basic Scars
Now that your skin is prepped and ready, it’s time to start creating your scars. Here are some techniques for creating basic scars:
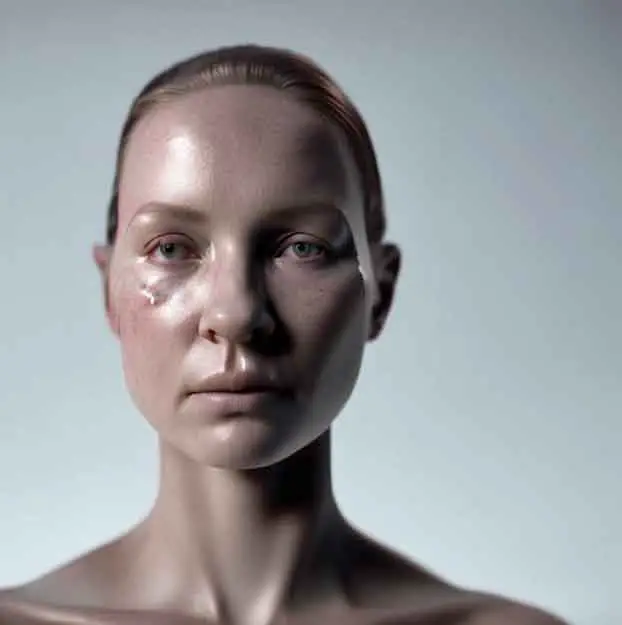
Using Makeup to Create Cuts and Scrapes
- Use a small brush or sponge to apply red or brown cream makeup in a thin line or irregular shape to create the appearance of a cut or scrape.
- Use a cotton swab or sponge to blend the edges of the makeup into your skin, creating a more realistic transition.
- Add a touch of black makeup or eyeshadow to the center of the cut or scrape to create depth and shadow.
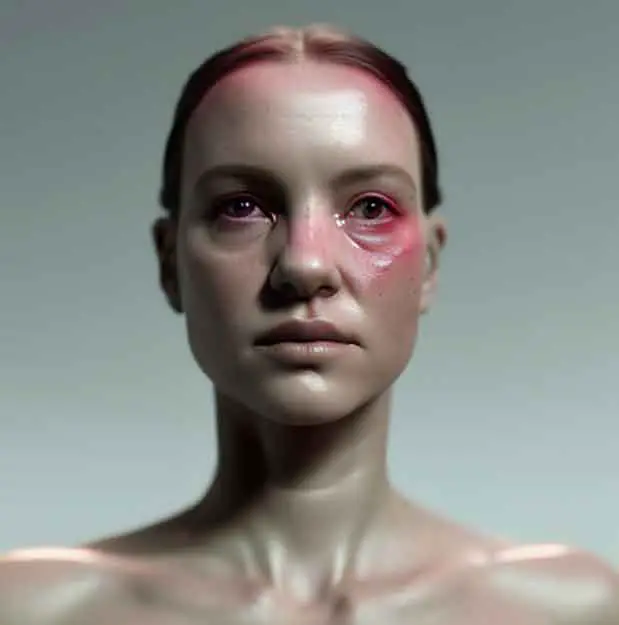
Adding Dimension to Scars with Shading and Highlights
- Use a small brush or sponge to apply black or brown makeup or eyeshadow to the edges of the scar to create shadow and depth.
- Use white or light-colored makeup to add highlights to the raised edges of the scar, giving it more dimension.
- Use a sponge or brush to blend the shading and highlights into your skin, creating a more natural-looking scar.
Creating the Appearance of Stitches and Staples
- Use black or brown cream makeup or eyeliner to create the appearance of stitches or staples.
- Use a small brush or sponge to apply a thin line of makeup or eyeliner to the skin where the stitch or staple would be.
- Use a cotton swab or sponge to blend the edges of the makeup into your skin to create a more natural transition.
Advanced Techniques for Realistic Scars
If you want to take your cosplay scars to the next level, try these advanced techniques:
Simulating Raised Scars with Liquid Latex
- Apply a thin layer of liquid latex to the skin where you want the scar to be.
- Use a cotton swab or brush to create a raised, irregular shape for the scar.
- Wait for the liquid latex to completely dry before applying makeup over it.
- Apply makeup to the scar as you would for a basic scar.
Creating Texture with Scar Wax
- Apply a small amount of scar wax to the skin where you want the scar to be.
- Use your fingers to shape the wax into the desired shape for the scar.
- Use a spatula or tool to create texture on the surface of the wax.
- Apply makeup to the scar as you would for a basic scar.
Making Fake Blood to Add to the Effect
- Mix red food coloring and corn syrup or honey to create thick, sticky “blood” for your scars.
- Apply the fake blood to your scars with a cotton swab or brush, being careful not to get it on your costume or surroundings.
Tips for Making Cosplay Scars Last
You’ve put in all the hard work of creating your scars, so now you want them to last all day. Here are some tips to help your scars stay in place:
- Set your makeup with powder or setting spray to keep it from rubbing off or smudging.
- Touch up your scars throughout the day if necessary, using the same techniques you used to create them.
- Avoid touching your scars or rubbing your face, as this can cause the makeup to come off.
- If you’re wearing a mask or helmet, be sure to apply the makeup to the areas that will be visible.
Removing Makeup Safely and Effectively
At the end of the day, it’s important to remove your makeup properly to prevent skin irritation or breakouts. Here’s how to do it:
- Use a gentle cleanser or makeup remover to remove the makeup from your skin.
- Use warm water and a washcloth to gently wash your face and remove any remaining makeup.
- Apply a moisturizer to hydrate your skin and soothe any irritation.
Practice your Scars at Home
One tip is to practice creating your scars a few times while at home. This way you can look at them several times in differing lights and various angles to see which ones you like best. The makeup and materials to create the cosplay scars are on the budget size so normally once you’ve bought the materials once, you’ll be able to make many, many scars before needing to refill any item. As such, this makes it a perfect technique to practice.
Conclusion: Bringing Your Cosplay to Life with Realistic Scars
Cosplay scars can be a great way to add depth and realism to your costume. With the right tools and techniques, you can create scars that look like they’re straight out of a movie or video game. Just remember to prepare your skin properly, use the right products and tools, and practice your techniques before the big day. With a little practice, you’ll be creating realistic cosplay scars in no time!